
The Full Guide to Creating an Alexa Skill with Flask-Ask
I’ve written several skills using the Flask-Ask framework but found Amazon’s basic tutorial to only work for short-term projects that would not be officially published. Recently, I wrote a post here about the environment I created to be a fast and reliable host for my published skills, specifically Explain Like I’m Five. That post explains the components and my reasons for using them. This is the technical guide to setting up that environment.
The Host
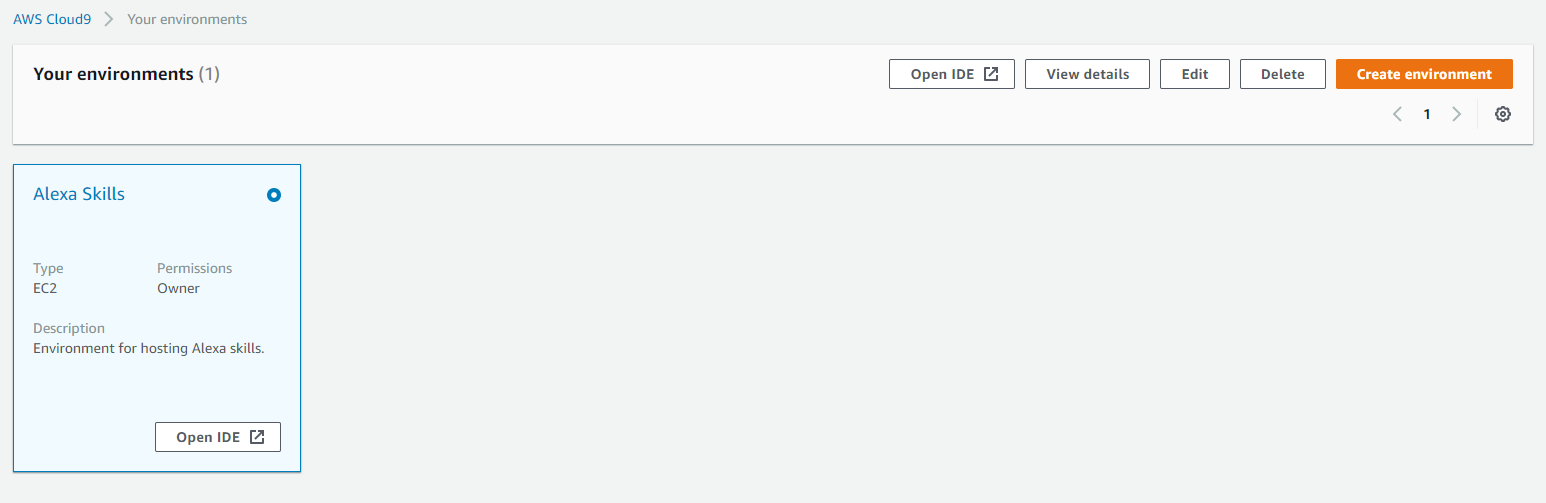
I chose to develop the code using Amazon’s Cloud9 service because it integrates with AWS and gives the ability to code in a browser. A new EC2 instance can be created when initializing a Cloud9 environment.
Create a New Cloud9 Environment
After clicking Create Environment give it a name and description. If you have a server you want to develop and/or host on, specify the user and host then add their public key to the authorized_keys file. Otherwise, create a new EC2 Instance. The default t2.micro type should be fine for only hosting several skills. The cost-saving setting is useful during development, but is not necessary with the large amount of credit Amazon offers and low cost of a t2.micro instance. When your skills are in production, turn cost-saving off.
Review your settings and start the instance.

Add Ports to Security Group
By default, only port 22 (SSH) is open. Alexa skills operate over HTTPS on port 443 so we need to add some rules to the EC2 security group.

The rules for port 80 are optional and just a precaution since Caddy redirects to HTTPS anyway. Ports used by Flask servers do not need to be opened because they will be behind the reverse proxy.
Connect To Your Environment
Go to the Cloud9 panel and the new environment will be visible. Select Open IDE to connect.
The welcome screen offers a few main configuration options like themes and keyboard mode as well as several ways to get started like cloning a git repository or creating a new file.
The Code
For consistency we’ll be creating the Memory Game skill used in Amazon’s tutorial. It’s a simple skill that covers all of basic aspects a programmer may need to understand.
Install Dependencies
To run a Flask server, Python needs to be installed. If Python or pip is not installed, you can run the following commands.
sudo yum update
sudo yum install python-pip python-wheel python-setuptools
Required Files
The Cloud9 environment starts in ~/environment. Create a folder called MemoryGame.
Main Application
Add a file named memory_game.pyby using the touch command, the graphical File -> New File option, or the keyboard shortcut Alt+N. The file explorer is in the lefthand panel of Cloud9. Double click the file to open it in the editor and add the following code.
import logging

from random import randint

from flask import Flask, render_template

from flask_ask import Ask, statement, question, session

app = Flask__name__)

ask = Ask(app, "/")

logging.getLogger("flask_ask").setLevel(logging.DEBUG)

@ask.launch

def new_game():

    welcome_msg = render_template('welcome')

    return question(welcome_msg)

@ask.intent("YesIntent")

def next_round():

    numbers = [randint(0, 9) for_ in range(3)]

    round_msg = render_template('round', numbers=numbers)

    session.attributes['numbers'] = numbers[::-1]  # reverse

    return question(round_msg)

@ask.intent("AnswerIntent", convert={'first': int, 'second': int, 'third': int})

def answer(first, second, third):

    winning_numbers = session.attributes['numbers']

    if [first, second, third] == winning_numbers:

        msg = render_template('win')

    else:

        msg = render_template('lose')

    return statement(msg)

if __name__ == '__main__':

    app.run(debug=True)
Response Template
Create another file named templates.yaml in the same Memory Game folder and add the responses below.
welcome: Welcome to memory game. I'm going to say three numbers for you to repeat backwards. Ready?
round: Can you repeat the numbers {{ numbers|join(", ") }} backwards?
win: Good job!
lose: Sorry, that's the wrong answer.
These two files are all that’s needed to run the Memory Game skill. The Flask server can now be started using the command
python memory_game.py
The server listens on http://127.0.0.1:5000 by default but can be changing the line in memory_game.py to app.run(debug=True, port=port). The host does not need to be changed because the Flask server will not be connecting to anything other than localhost.
The Networking
Endpoint
Unless configured otherwise, EC2 instance IP addresses will not stay the same. A dynamic DNS (DDNS) name is ideal since it is automatically updated when the IP address changes.
DuckDNS is just one organization that provides this service for free. There are a variety of sign-in options. Choose your preferred method. Add a new domain by simply entering the desired subdomain. You will need a subdomain for each skill you develop.
Follow the installation instructions for linux-cron. In summary:
1. Make a new folder for the update script

mkdir ~/duckdns

2. Create and edit the update script

touch duck.sh

3. Add the single line

echo url="https://www.duckdns.org/update?domains=**MYFULLDOMAIN**&token=**MYGIVENTOKEN**&ip=" | curl -k -o ~/duckdns/duck.log -K -

4. Make the script executable by the owner

chmod 700 duck.sh

5. Create a cronjob to run the script every 5 minutes

crontab -e

*/5 * * * * ~/duckdns/duck.sh >/dev/null 2>&1

6. Test the script

./duck.sh

7. Check duckdns.org to see if the IP has been updated.
Alexa Skills not in a Lambda function are required to have an HTTPS certificate. Flask is not meant to be a full web server and therefore does not have easy HTTPS support.
Reverse Proxy
Caddy is a dead simple reverse proxy full of additional features. Another proxy such as NGINX can be used if desired. The same principles still apply. This proxy will do all of the HTTPS encryption as well as fetch data from each skill’s Flask server so that multiple skills can be hosted on the same instance on port 443. As an added bonus, Caddy automatically creates Let’s Encrypt certificates for your domain. To install Caddy in one step using bash, run curl https://getcaddy.com | bash -s personal.
Caddy uses a default configuration file named Caddyfile. Here is a basic configuration for a single domain with a default Flask server running.
mydomain.duckdns.org {
    proxy / localhost:5000
}
That’s it. The top line is the DDNS name we created before. The next line simply proxies all requests to the Flask server running on port 5000 on the same server. There are additional configuration options that can be used in Caddy’s documentation.
To start Caddy, simply run the caddy command with no arguments in the same directory as the configuration file.
Skill Configuration
Head to your list of skills, log in to your Amazon account, use the Alexa Skills Kit. Click Add a New Skillin the upper right to start a fresh configuration.
Note: This section may refer to an older version of the skill creator as Amazon is currently testing a new beta version.
Skill Information
The default skill type Custom Interaction Model is what the memory game uses. Give it a name and invocation name of “memory game”.
Interaction Model
The interaction model is how Alexa decides what information to send your skill. The intent schema defines intents and slots. Intents are a single conclusion Amazon makes based on the voice input. For example, saying “stop”, “stop it”, and “terminate” can all probably be grouped into the AMAZON.StopIntent intent. This makes it easy for developers to program logic for a single case and leave the voice processing for Amazon.
In the Intent Schema field add:
{

    "intents": [{

        "intent": "YesIntent"

    }, {

        "intent": "AnswerIntent",

        "slots": [{

            "name": "first",

            "type": "AMAZON.NUMBER"

        }, {

            "name": "second",

            "type": "AMAZON.NUMBER"

        }, {

            "name": "third",

            "type": "AMAZON.NUMBER"

        }]

    }]

}
Slot are variables that the user says and can then be used in your program. Again, the developer defines the model of how slots should fit into a phrase, but does not directly parse anything. In this case, the slots are the first, second, and third numbers the user says. Slots are already figured out before it hits your program. They are then defined in the convert={first: int} argument to make usable variables in the function.
Custom Slot Types are used to define categories of input that are not grouped in Amazon’s intents. They do not need to be used for the memory game. I used a custom slot in my Explain Like I’m Five skill to give example questions because those were the only kinds of input I wanted to program for.
Example phrases help Alexa learn if a phrase is relevant to the skill. This is also where slots locations are defined. For the memory game, use these example phrases or try out your own.
YesIntent yes

YesIntent sure

AnswerIntent {first} {second} {third}

AnswerIntent {first} {second} and {third}
Configuration
Select HTTPS instead of a Lambda function and enter the DNS subdomain for the skill. All other options can be ignored.
SSL Certificate
Caddy’s Let’s Encrypt certificates are trusted by Amazon so select “My development endpoint has a certificate from a trusted certificate authority”.
Test
Enable testing. Start caddy and the memory game in Cloud9 then try out different phrases. Make sure it is able to reach the endpoint and get a response. Use echosim.io or a real Echo device to test the skill. The skill should already be enabled on your account, but if it is not say “Alexa, enable Memory Game”.
Running Services
Caddy and Flask both run in the foreground by default by typing a command. That means Caddy and each skill needs its own shell to run which takes up space in the Cloud9 IDE.
Basic Way
Screen and tmux are tools to create persistent shells that last after logging out and can be detached/resumed without stopping running commands. To run a Flask server in a screen shell run the command “screen”. Navigate to the MemoryGame directory and run the python application normally. When it starts, press Ctrl+A, Ctrl+D to detach from the current screen. You can then resume using screen -r. If there are multiple screens, keep track of their names. By default they use the process ID (PID) of the screen. This can be changed using the -S **sessioname** option.
Best Way
Using screens still requires the services to be started manually and there’s no easy way to monitor their status. Amazon Linux uses System V scripts to manage services. Bash scripts following this format can be configured to start on boot. After the services are configured, the EC2 instance can be restarted and the skills will be started automatically.
Make a directory called services in ~/environment.
Init Script
The System V init script is adapted from this post on the topic. The Caddy service will be slightly different from the Flask-Ask services but will have roughly the same format.
Caddy Service
First, I moved the Caddyfile to a neutral place such as /usr/local/files/Caddyfile so that the service can easily reach it.
#!/bin/bash
#description: Caddy reverse proxy for Amazon Alexa Skills

# Get function from functions library
. /etc/init.d/functions

#Start the service
start() {
        echo -n "Starting Caddy Reverse Proxy server" | logger
        /usr/local/bin/caddy -conf /usr/local/files/Caddyfile &
        ### Create the lock file ###
        touch /var/lock/subsys/caddyd
        success $"Caddy Reverse Proxy server startup"
        echo
}

# Restart the service
stop() {
        echo -n "Stopping Caddy Reverse Proxy server" | logger
        killproc caddyd
        ### Now, delete the lock file ###
        rm -f /var/lock/subsys/caddyd
        echo
}

#!/bin/bash
if [[ $EUID -ne 0 ]]; then
   echo "This script must be run as root"
   exit 1
fi

### main logic ###
case "$1" in
  start)
        start
        ;;
  stop)
        stop
        ;;
  status)
        status caddyd
        ;;
  restart|reload|condrestart)
        stop
        start
        ;;
  \*)
        echo $"Usage: $0 {start|stop|restart|reload|status}"
        exit 1
esac

exit 0
Memory Game Service
There are two things the service requires since it manages a Python appication. If the skill uses relative paths, the script needs to change directories to where the skill is located. The skill should also be run as the ec2-user rather than root using the sudo -u command.
#!/bin/bash
#description: Memory Game Flask-Ask Server

# Get function from functions library
. /etc/init.d/functions

#Start the service
start() {
        echo -n "Starting Memory Game Flask-Ask server" | logger
        cd /home/ec2-user/environment/MemoryGame/
        sudo -u ec2-user python3 memory_game.py &
        ### Create the lock file ###
        touch /var/lock/subsys/memorygame
        success $"Memory Game Flask-Ask server startup"
        echo
}

# Restart the service
stop() {
        echo -n "Starting Memory Game Flask-Ask server" | logger
        killproc memorygame
        ### Now, delete the lock file ###
        rm -f /var/lock/subsys/memorygame
        echo
}

#!/bin/bash
if [[ $EUID -ne 0 ]]; then
   echo "This script must be run as root"
   exit 1
fi

### main logic ###
case "$1" in
  start)
        start
        ;;
  stop)
        stop
        ;;
  status)
        status memorygame
        ;;
  restart|reload|condrestart)
        stop
        start
        ;;
  *)
        echo $"Usage: $0 {start|stop|restart|reload|status}"
        exit 1
esac

exit 0
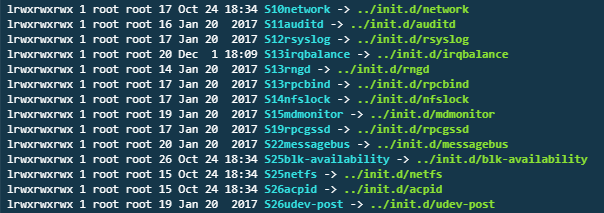
This system uses linked files (think shortcuts) to organize init scripts. The /etc/rc*.d/ directories specify certain runlevels which are modes of operation for the operating system. You can read more about them on the Wikipedia page.
If you run ls -l /etc/rc3.d/ you will see all of the files point to a script in /etc/init.d/.
 Instead of copying the files, we’ll create a symbolic link in the
 /etc/init.d/ directory and then another link to the /etc/rc3.d/ directory which is the normal operation runlevel.
sudo ln -s ~/environment/services/memorygame /etc/init.d/
sudo ln -s /etc/init.d/memorygame /etc/rc3.d/
Now, make sure your services aren’t running elsewhere and run /etc/init.d/memorygame start. Check /var/log/messages for the script’s output. Flask’s output will show in the terminal, but press Enter to reach the commandline again. Restart the host to make sure everything has been properly configured.
Unlike ngrok, nothing needs to be changed in the skill configuration after restarting since the DuckDNS name stays the same.
Conclusion
You should now have a skill that runs automatically when the EC2 instance boots. When the environment is configured for one skill, it’s easy to add more and host them all on the same server.